Posts

Showing posts with the label DIY

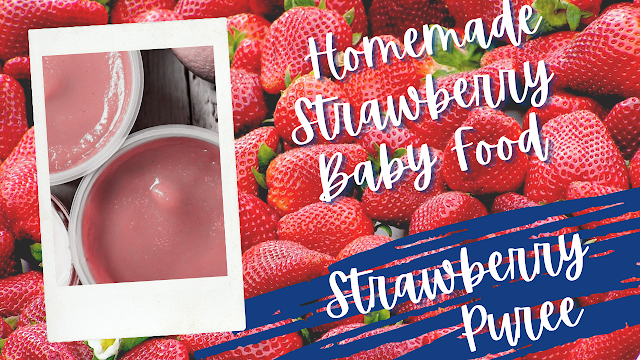
Cherry Baby Food Purée | Organic Homemade Baby Food | First Foods

Image
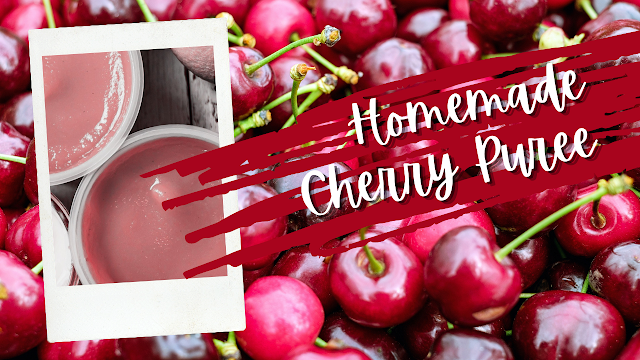
Follow along to learn how you can easily make your baby's cherry puree from your kitchen. You can choose to steam cherries, boil in a sauce pan or use an instapot.  Cherries are an excellent source of fiber and vitamin C. Adjust the liquid content to suit your desired consistency for your baby. Cherries are great for making a puree that works well for introducing a single food or adding a touch of sweetness to your combined baby food purées. By making your own baby food, you know exactly what goes into it and can avoid preservatives. We are choosing to start adding in purees at 6 months, but talk to your doctor to decide when to introduce foods into your baby's diet.  For our homemade baby food, we are using organic produce to avoid any pesticides or other chemicals being added to our baby's puree. By buying fresh fruit when it is in season, you can save money on your baby food as well as getting the highest nutritional content. Frozen cherries and dehydrated cherri...

How to Make Strawberry Purée | DIY Baby Food

Image
Strawberries are great for making a super quick puree that works well for introducing a single food or adding a touch of sweetness to your combined baby food purées. By making your own baby food, you know exactly what goes into it and can avoid preservatives. We are choosing to start adding in purees at 6 months, but talk to your doctor to decide when to introduce foods into your baby's diet. For our homemade baby food, we are using organic produce to avoid any pesticides or other chemicals being added to our baby's puree. Ideally, we would grow our own, but that adds a whole lot of work to this simple process. By buying fresh fruit when it is in season, you can save money on your baby food as well!  Start by rinsing well. If you're not using organic consider doing a short baking soda soak.  Cut off any bruised or overly ripe. You'll also cut off the greens and core the strawberries. Rough chop your strawberries.  Either boil (cook down) your strawberries without ad...

Yarn Ball Piñata Tutorial - DIY - How to Make a Pinata

Image
Today we finish up our Cat Party series. We've already made a kitty litter cake and a black cat cheese ball, but to finish it out we are making a yarn ball piñata. I mean it's not a party until you have a pinata right? This fairly easy paper mache craft is an affordable alternative to store bought and can be a fun DIY project. Let's jump in! How to make a pinata? What you'll need Newspapers or magazines - cut to 1/2 strips Balloon or bowl (balloons are easier) Flour (or elmers glue ) Water String Yarn Cut newspaper or old magazines into 1" strips. Thicker magazines don't work as well. I would recommend either newspaper or thinner magazine pages (skip the covers for better workability).  Begin by inflating a balloon, or by choosing the bowl you plan to use. If using a bowl, cover with saran wrap to allow for easy removal.   Mix flour paste. Combine water and flour to get a gravy-like texture or think pudding before it sets. Elmer's glue can be used in plac...

How to Crochet - Beginner Basics - Single Crochet (Sc)

Image
So you want to crochet? You'll need to learn how to complete the single crochet stitch for starters. After the chain stitch, it is the most common stitch in crochet projects. It is typically abbreviated as sc followed the the number of stitches. For example, sc 10 would mean single crochet 10. Once you've mastered this stitch, you can complete a simple washcloth or blanket. In the video below, I will show you how to complete the single crochet before continuing on to demonstrate how to complete a cotton washcloth. Practice with me to complete your first project! What You'll Need: Yarn - Cotton Crochet Hook - Size F VIDEO Start by forming a slip knot . Ch- 31.  Insert hook into second chain from hook. Yarn over and pull through. You will now have 2 loops on your hook. Yarn over, pull through both loops. You have now completed your first single crochet (sc). SC in next 29 ch stitches for a total of 30 stitches.  Ch-1, turn work. Sc- 30. Re...

How to Fix A Leaky Hose

Image

How to Install Backsplash Part 3

Image

How to Install Backsplash Part 2

Image

Backsplash Preparation

Image

Considerations for Homeowner Concrete Repair Pt 3

Image
In Parts 1 & 2 we discussed some the causes and criteria for evaluating cracked PCC, now in Part 3 I will cover some of the options available for crack remediation. A word of caution to those who have not experienced the brutal stubbornness PCC removal, in certain situations, can be capable of inflicting, start in a small non-essential area and equip yourself with adequate tools for the task. Alternative 1: Do Nothing Always an option but you need to evaluate your situation independently. Alternative 2: Rout & Seal PCC Cracks This method is likely to be the most common for the average homeowner as it is relatively low cost and does not require a high degree of skill. Routing and sealing is largely intended to waterproof the crack, while providing some degree of overall aesthetic improvement. It does not join/fuse or restore any strength to the panel and does not work well with high movement/deflection...

How to Crochet - Beginner Basics - Chain Stitch (ch)

Image
So you want to crochet? You'll need to learn how to complete the chain stitch to start out. It is the foundation of your crochet projects. It is typically abbreviated as ch or chs followed by the number of stitches. For example ch 10 would be chain ten. What you need to crochet: Yarn Crochet Hook Start by forming a slip knot. Click the link to see our previous post on how to create a slipknot along with a video. Place your crochet hook inside the slipknot. Tips on holding the yarn: Hold the slipknot in left hand and use your left thumb to hold the tail of the yarn. Tips of holding the crochet hook: Hold the crochet hook in your right hand. Your thumb and index finger should be on the flat part of the crochet hook with the rest of your fingers curled around the handle. Crochet hook should be facing upwards. Slide the hook between yarn and left hand index finger. Grab the yarn (or yarn over) with the crochet hook. Pull the yarn dow...

How to Crochet - Beginner Basics - Slipknot

Image
There are so many projects that you can make once you know how to crochet. Which is why we're going to begin at the beginning so you can follow our patterns in the future with ease. Different patterns use different stitches, hooks, and yarns. We're going to begin by showing you stitches. Patterns usually indicate hook size and yarn type. It is easiest to buy a set of hooks so you have all available. Amazon has a great selection to choose from. What you need to get started: Crochet Hook Yarn Once you have your slipknot you can progress to our next post How to Crochet - Beginner Basics - Chain Stitch (CH or chs)

Considerations for Homeowner Concrete Repair Pt 2

Image
Glad you were able to tune in for Part 2 of our concrete series where I will give some tips and tricks on identifying causes of concrete failure and methods for DYI repairs. Before we get started, a brief clarification on the term concrete which is synonymous with Portland Cement Concrete (PCC) and widely accepted as a reciprocal. However, concrete is the mixture of a binder/glue and aggregate, and many types of concrete exist such as asphalt concrete, resin concrete, or the most famous Portland Cement Concrete. Please also note the term cement is used when referring to a neat mixture of binder/glue, think of the plaster of Paris used in sheetrock. With that pet peeve addressed lets dig into identifying some common root causes of PCC failure. Uncontrolled Cracking - A menacing term with simple meaning, this is any cracking that occurs outside of the intended locations or joints. Typically affects relatively new PCC < 1 year in age and is co...

Considerations for Homeowner Concrete Repair Pt 1

Image
Spring has finally arrived, banishing old man winter for nicer weather! However, it is possible old man winter has left a few things behind in your driveway, patio or perhaps walkway adjacent your house. I am not talking about snow but freshly cracked concrete! Winter and subsequently its partner in crime frost or frozen ground, can be very hard on your paved surfaces when Spring rolls around causing a phenomena known as frost heave. This distress results in the movement and short term weakening of subsurface soils/aggregates reducing support to the pavements above. The most basic analogy I can provide is trying to cut a peanut butter tortilla sandwich and the peanut butter squishes out the sides. That is similar to what is going on under your sidewalks and driveway during the Spring thaw, a soft saturated layer of material trapped between an upper layer of hard pavement and bottom layer of hard fr...

The Thrifty Method of Hair Removal

Image
Hopefully you've had time since the last post to make some sugar wax and are ready to wax your legs! This is a pretty simple, but not completely painless process. It should take less than half an hour to complete the lower half of your legs. Begin by gathering your materials. You'll need: Sugar Wax Fabric Strips * Tongue Depressor Towel *Buy precut online or at beauty stores   Dishcloths can be cut to create reusable waxing strips   Old-Shirts can also be used Begin by heating your wax in the microwave for about a minute. Time will vary depending on how much you are heating up at one time. The wax should be fairly liquid when it has reached the correct temperature. Be sure you stir the wax well to make sure your sugar has not separated out of the mix. Check the wax temperature and have a wet cloth nearby in case the wax is too hot. Be careful not to burn yourself! I put a towel down on the bathroom floor to prevent the wax from get...

DIY Sugar Wax

Image
Besides being annoying, hair removal can get expensive. If you're currently shaving your legs, you could be saving money by switching to waxing. A cheap disposable razor starts around $1 and these usually only last a few uses. I know I switch mine every two weeks or so. This puts shaving at a minimum cost of $26/year, not to mention if you buy nicer razors, use shaving cream, or the cost of all that time you spend shaving. One article that breaks down the cost further can be found at Confessions of the Professions . I know what you're thinking, that buying those waxing kits or making trips to the beauty parlor for your monthly waxing adds up fast too. That is 100% true and that's why you shouldn't be doing either of those. I can't justify spending $50-$80 to get my legs waxed by a professional, nor can I make myself spend the money to buy the kits which start around $10 for the cheap ones. The solution is to do it all at home. You can make your own sugar wa...

Striped Baby Mittens

Image
As promised, these are the mittens I made to match the baby hat I posted about previously. I actually made these the same week I finished the hat, but life has gotten busier and busier so this is just getting posted now. With these I followed the sizing and decreases from The MuckyMacBook , but changed the rest of the pattern to get the look I wanted. These were really easy and made the pair when I was sitting around one Saturday morning.  These mittens were sized to match the hat, meaning both are for the 0-3 month range.  Materials Used: Black Acrylic Yarn (A) White Acrylic Yarn (B) Tapestry Needle Size 6 Knitting Needles CO 28 with A 1-12) K1, P1 in Rib Stitch for 12 rows using color A. 13) K1, M1L, K26, M1L, K1 14) Switch to color B and purl entire row. 15) K1, M1L, K28, M1L, K1 16)Purl 17)K1, M1L, K30, M1L, K1 18) Switch to color A and purl 19) K1, M1L, K 32, M1L, K1 20) Purl 21)Knit 22)Switch to color B and purl 23) Knit 24) Purl 25) Knit...

Crafty House Warming Gift

Image
My sister is moving into her first house later this month and I couldn't decide what I should get for a house warming gift. Usually if you buy something from a store, everyone knows how much you spent. Having said that, it reflects poorly if you spend say $5 when others might spend $20. So, I decided to make my presents. I recently taught myself to knit. It's pretty simple to learn and there are tons of how to guides with pictures and movies online. I didn't say I am great yet, but good enough to make something worth using. I searched for towels or dishcloths, anything that would be fairly simple, but still useful. After some searching I found this great pattern online and it is actually offered as a free pattern, making it even better! The pattern makes two hand towels and three dishcloths. It calls for three colors, but I bought my yarn on sale and only two matching colors were on sale, therefor, I am using only two. You can buy knitting needles fairly cheap on ebay or...